Free AR Apps from WSCAD
The modular WSCAD software supports engineering with many functions for standard-compliant documentation. Modern 3D technology and augmented reality (AR) enable interactive work in control cabinet construction, installation technology and building automation.
Maintainer and service technicians can scan individual cabinet components with the WSCAD Cabinet AR App and immediately receive information about the component as well as its position in the electrical plans. Using the WSCAD Building AR App, rooms are captured and converted into floor plans for building design and electrical installation.
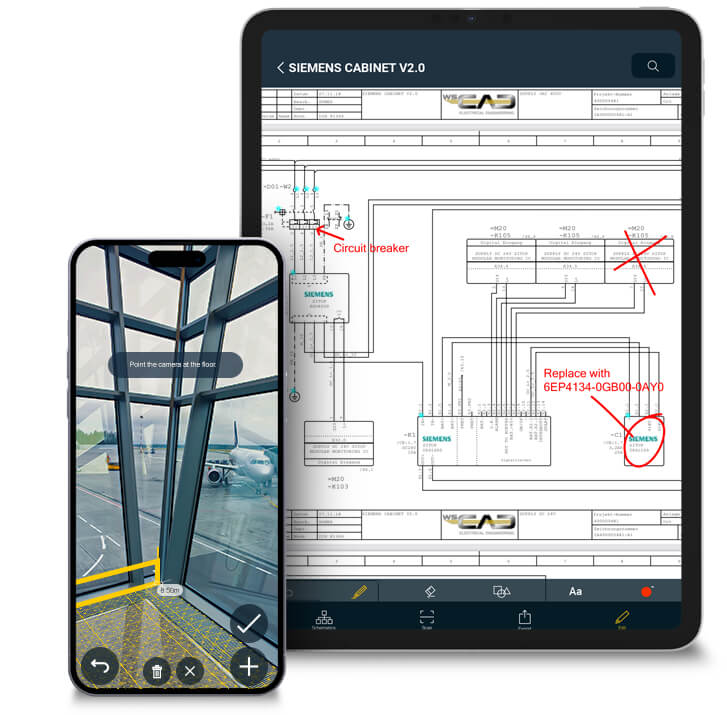
WSCAD Cabinet AR App
The WSCAD Cabinet AR app allows you to retrieve information about the schematics and components of a cabinet using your tablet or smartphone. The documentation is available completely and in accordance with the standards in the form of intelligent PDFs with cross-references. A special viewer tool is not required. The technician or maintainer on site can immediately switch from the control cabinet to other schematic thanks to the app.
With the camera of your mobile device, you scan the WSCAD QR codes that are attached to the components. The app recognizes the scanned component, displays it in the schematic and shows all technical data and comments. Maintenance staff have all information immediately available without searching in the documentation. Using the label function of the WSCAD software, you can generate the QR codes quickly and easily.
The engineer on site can use the app to immediately note changes and comments in the PDF with the new redline function. These correction notes are added to the schematics and, after export to cloud storage, are available to all those involved for further editing in the WSCAD software.
In addition, you can mark connections (wires) that you have already wired in the control cabinet in the wiring list. This gives you a clean overview of connections that are still missing.
- Display information of the components
(reference name, function text, part number, manufacturer) - Interactive 3D models of the components
- Call up data sheet
- Display schematics
- Add changes and comments immediately recognisable in the schematics (via redline function) and make them available to all participants
- Call up wiring information of the control cabinet
(target 1, target 2, potential, wire cross-section, wire color code) - Mark wired connections
- Export changes back to the cloud for further editing
Want to try out the app directly? Here you will find cabinet superstructures from Siemens or Schneider Electrics including QR codes for testing.
Here you can find out even more about professional cabinet engineering with WSCAD software.
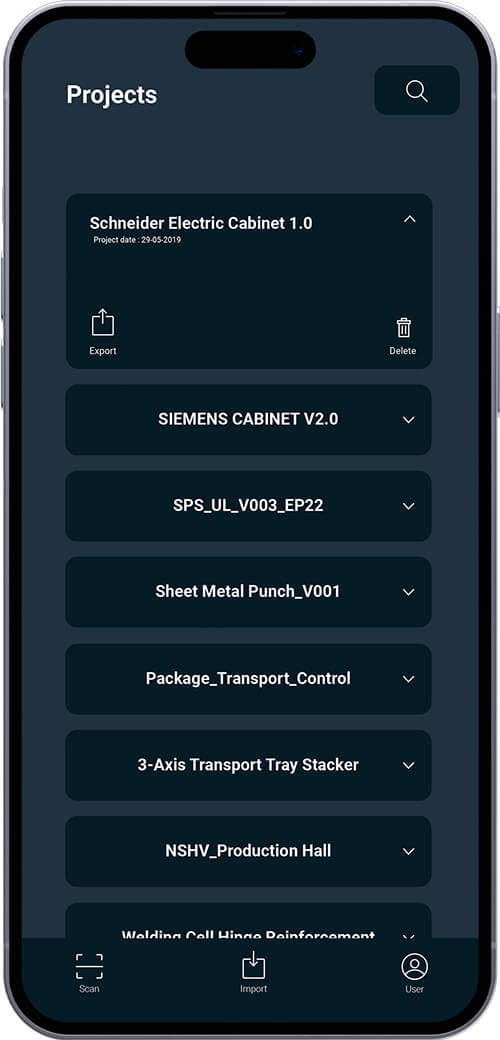
All your projects at hand on one device
Save space and resources with your digitalised schematics clearly arranged on your mobile device (iOS or Android). This eliminates the need for paper schematics and changes are immediately accessible to all participants. Notes and changes are not lost and errors during maintenance are thus avoided.
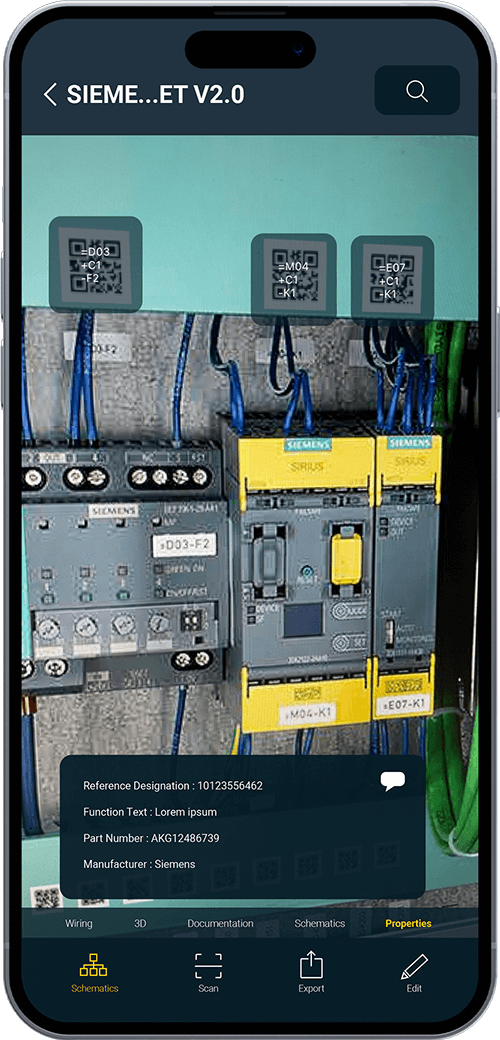
Retrieve component information
As soon as you have captured a WSCAD QR code with the camera in “Scan” mode within the Cabinet AR app, you will see the available information of the component (e.g. reference mark, function text, item number, manufacturer, connections) at the bottom of the screen.
The “3D” button shows you a 3D view of the selected component, which you can rotate 360°, as well as zoom in and out.
Via the “Documentation” button, you can call up further information of the component directly via the manufacturer’s website or the WSCAD article database wscaduniverse.com.
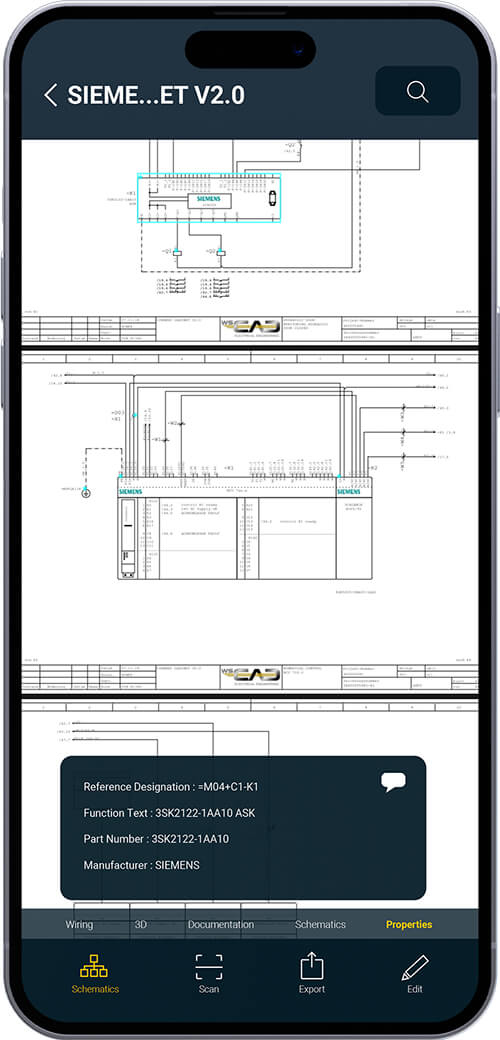
Show component in schematic
Switch between the component representations within the schematic and the control cabinet layout. Use the blue tap points to select a component and display its information.
With the comment icon (speech bubble icon ) in the component information you can add notes to the components.
With the button “Documentation” it is possible to display additional information in the form of a data sheet and with “3D” the component in 3D.
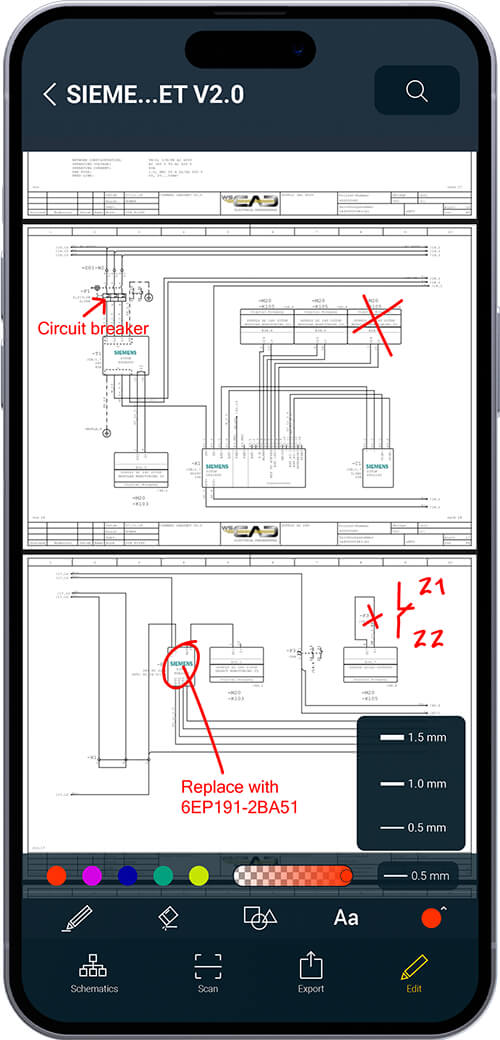
Inserting corrections with redlining in the schematics
Changes and comments can be made directly in the schematics on site. It is therefore no longer necessary to carry paper documents. You can send the changes electronically (e.g. by e-mail) for further processing.
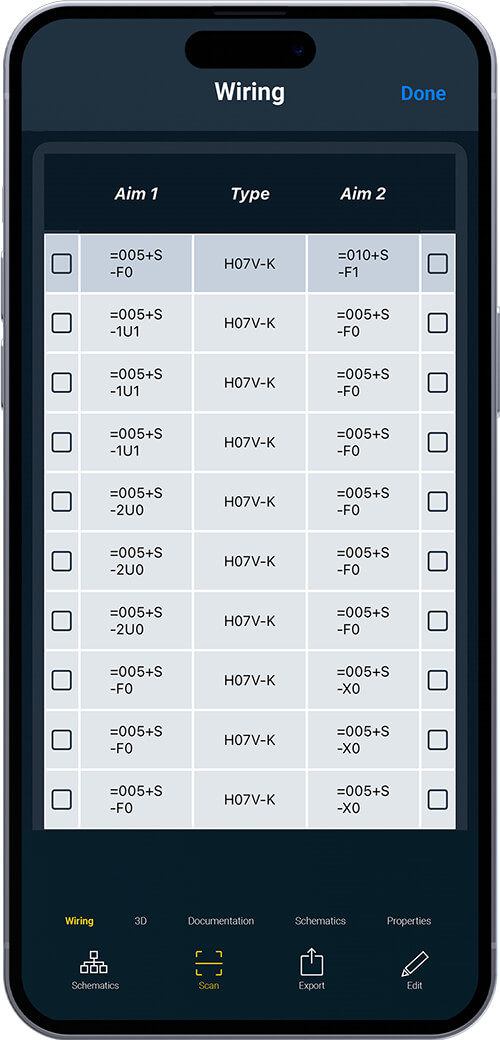
Edit wiring information
The wiring list clearly shows you all the connection information between the components. In addition, you can “check off” the connection (wires) – which you have just wired on site in the control cabinet – in the list and thus mark it as done. Each line represents a single connection (wire).
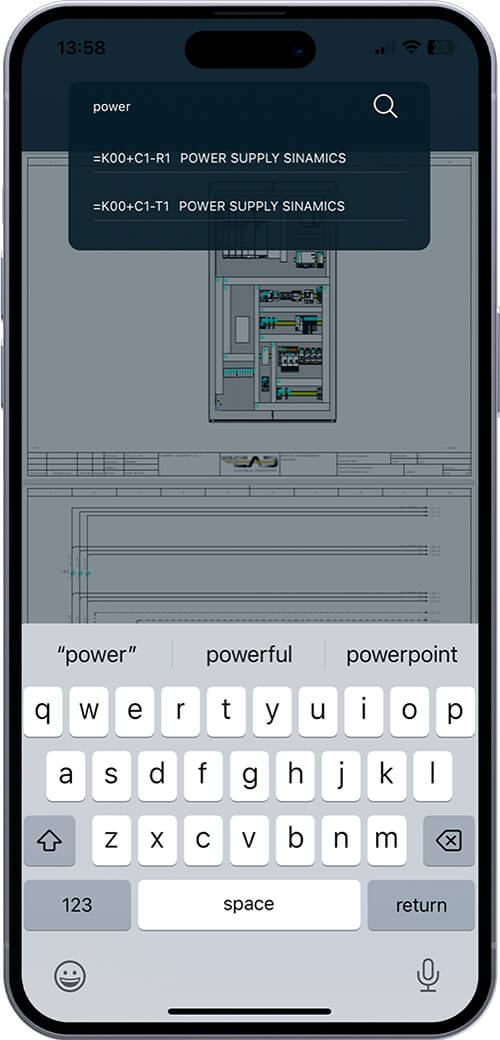
Component search
With the new search function (magnifying glass icon ) you can find components across schematics by the referene name or the function description.
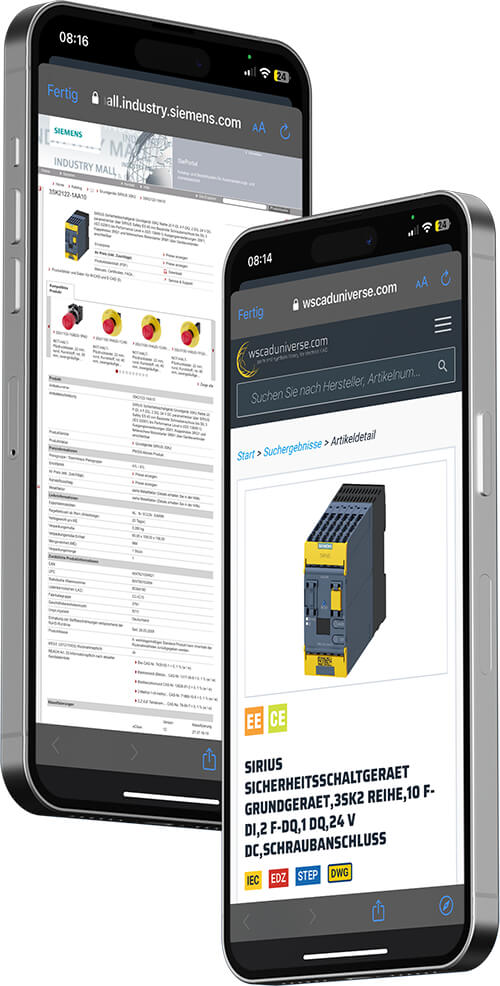
Further component information
Via the “Documentation” button, you can call up further information of the component directly via the manufacturer’s page or the WSCAD article database wscaduniverse.com.
WSCAD Building AR App
With the WSCAD Building AR app, you can create a building plan using your mobile device (tablet or smartphone) and then import it as a background into the WSCAD schematics. To do this, simply scan the rooms of the building with the camera of your mobile device and merge the rooms and floors into a plan as DXF or PDF.
- Create/open project
- Scan room
- Add windows and doors
- Structure rooms
- Display plan
- Export plan
- Import plan into WSCAD software
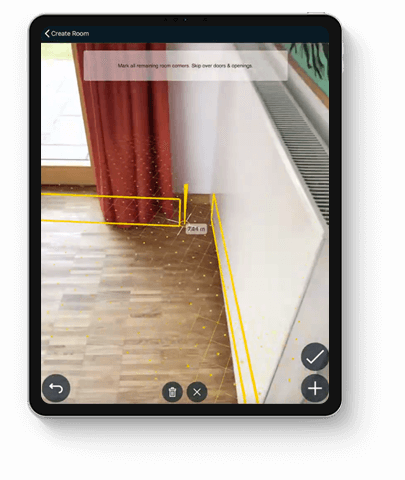
Capture rooms
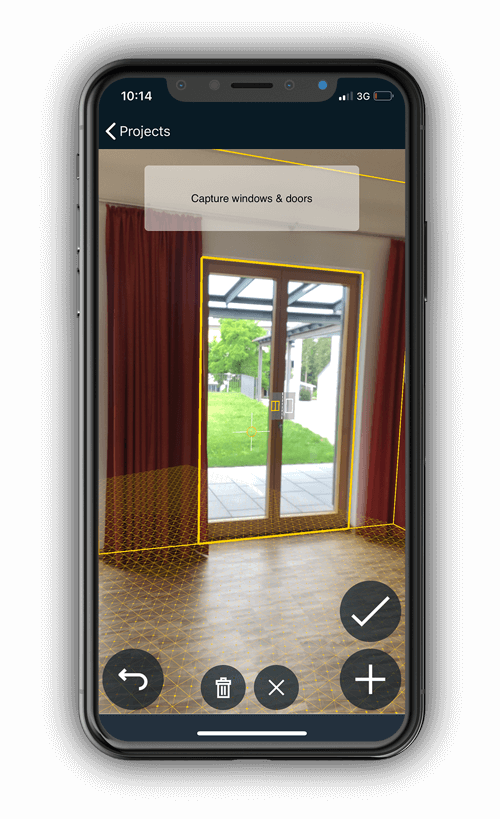
After you have created a new project in the app, you define all the corner points on the floor of the room and also a corner point on the ceiling with the camera of your mobile device. This way you have recorded the floor space and the height of the room.
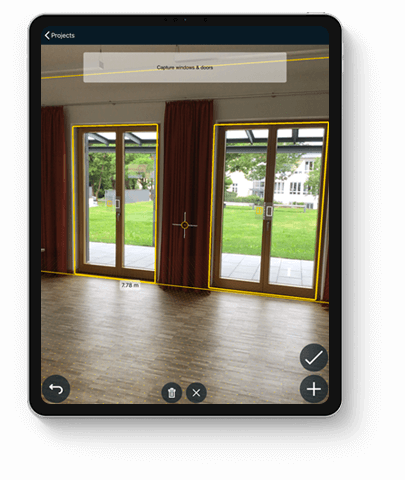
Add windows and doors
In addition, you can drag frames over the windows and doors of the room and add them to the plan. Finally, assign a room number and optionally a room name and a room type for the room. Now you can enter additional rooms and combine them into one floor.
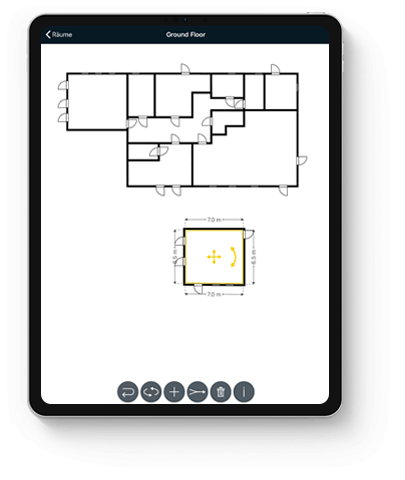
Edit plan
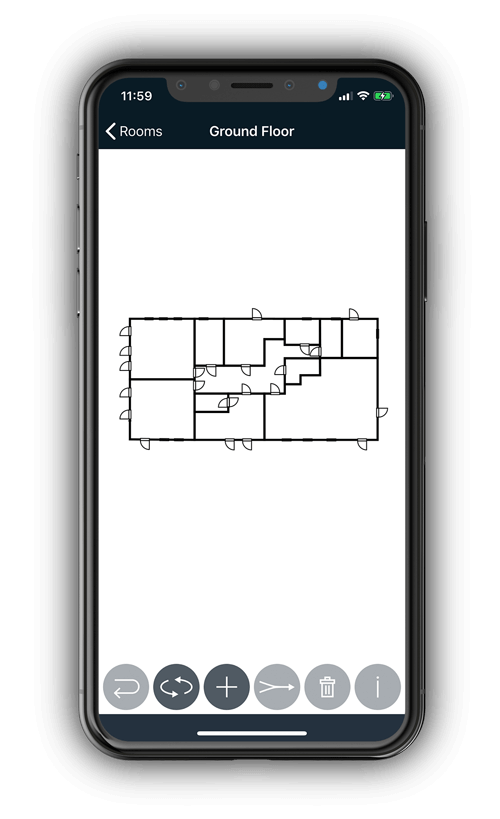
For each floor you can call up the plan with the included rooms. You can use the Merge icon to combine several rooms into one room and the Rotate icon to rotate the entire plan. If you tap on a room, the whole room is displayed below the plan with its room dimensions. Here you can move and rotate the room.
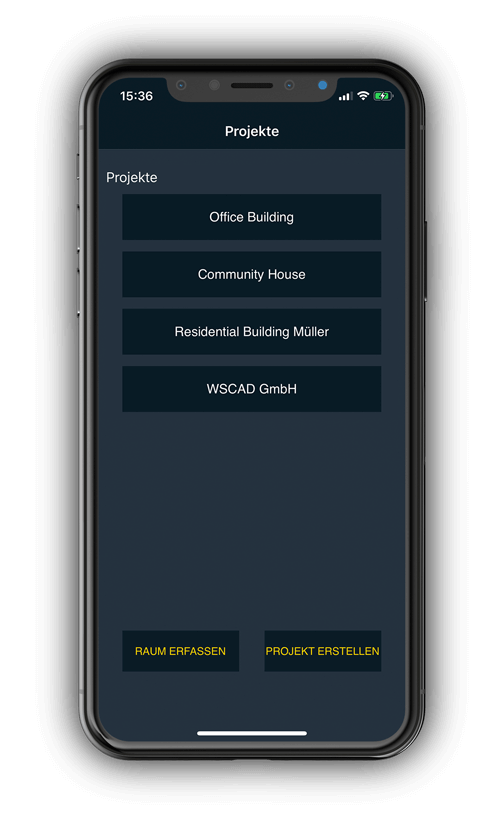
Manage projects clearly
Measuring rooms simply via the camera
Create floor plan easily
Hintergrundverlauf
Hintergrundverlauf